My AllSky Build
Introduction
What is an AllSky Camera?
An AllSky camera is a specialized camera designed to capture the entire celestial hemisphere in timelapse. It's a fantastic tool for anyone interested in astronomy, meteorology, or simply capturing the beauty of the sky.
Why Build One?
Whether you're an amateur astronomer, a weather enthusiast, or someone who appreciates the beauty of the night sky, an AllSky camera can be an invaluable asset. Moreover, this project serves as an excellent STEM activity to engage kids in both computer science and astronomy. Once set up, you'll have a delightful little present to look forward to each morning—a timelapse of the night sky!
What to Expect
In this comprehensive guide, you'll learn how to build your own AllSky camera, from sourcing the materials to the final assembly.
PARTS LIST
Argon Fan for Rpi - To keep your Raspberry Pi cool in the enclosure.
Rpi HeatSinks - Add additional cooling protections
Ethernet Bulkhead Connection - To establish a waterproof Ethernet connection.
Waterproof Junction Box - To safely house the hardware.
PCB Feet - To mount the Raspberry Pi securely.
POE Splitter - To power the Raspberry Pi.
Acrylic Dome _ To protect the lens.
HQ Camera - The high-quality imager for capturing the sky.
120 degree lens - The lens compatible with the HQ Camera.
RPI Camera Cable - Longer cables for the camera connection.
POE Injector - Necessary if your router is not POE
Raspberry Pi 4 - With at least 4GB of ram
Part 1: The Concept Behind AllSky Cameras
Basic Concept
An AllSky camera captures a 180-degree view of the sky, offering a panoramic view of celestial events.
Applications
This camera is incredibly useful in astronomy for tasks like meteor tracking, cloud cover assessment, and capturing astronomical phenomena.
Part 2: Required Tools and Materials
Tools Needed
Phillips head screwdrivers
A drill and drill bits for creating the necessary holes
Part 3: Preparing the Software
Software Requirements
Operating system, camera drivers, etc.
Setting Up the Environment
How to install and configure the necessary software.
Coding Aspects
If you're using C/C++ or Python, here's how to set up the code for capturing images.
Part 4: The Build Process
1. Camera Mounting
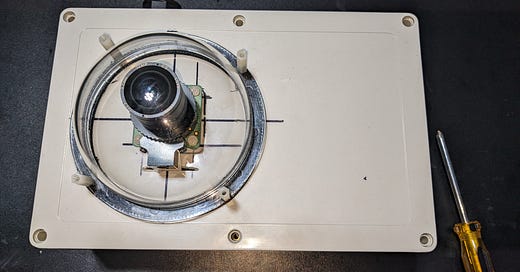
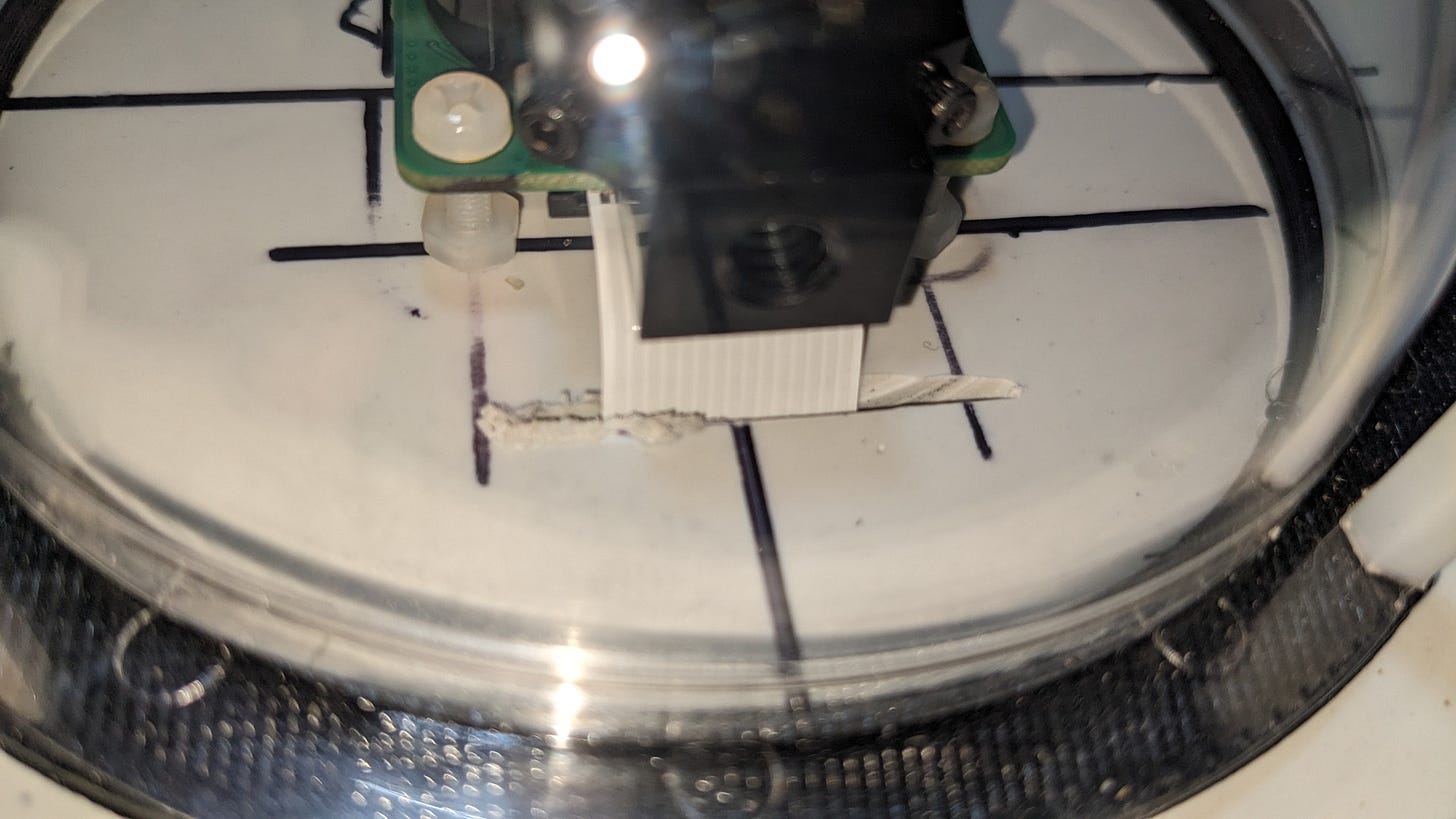
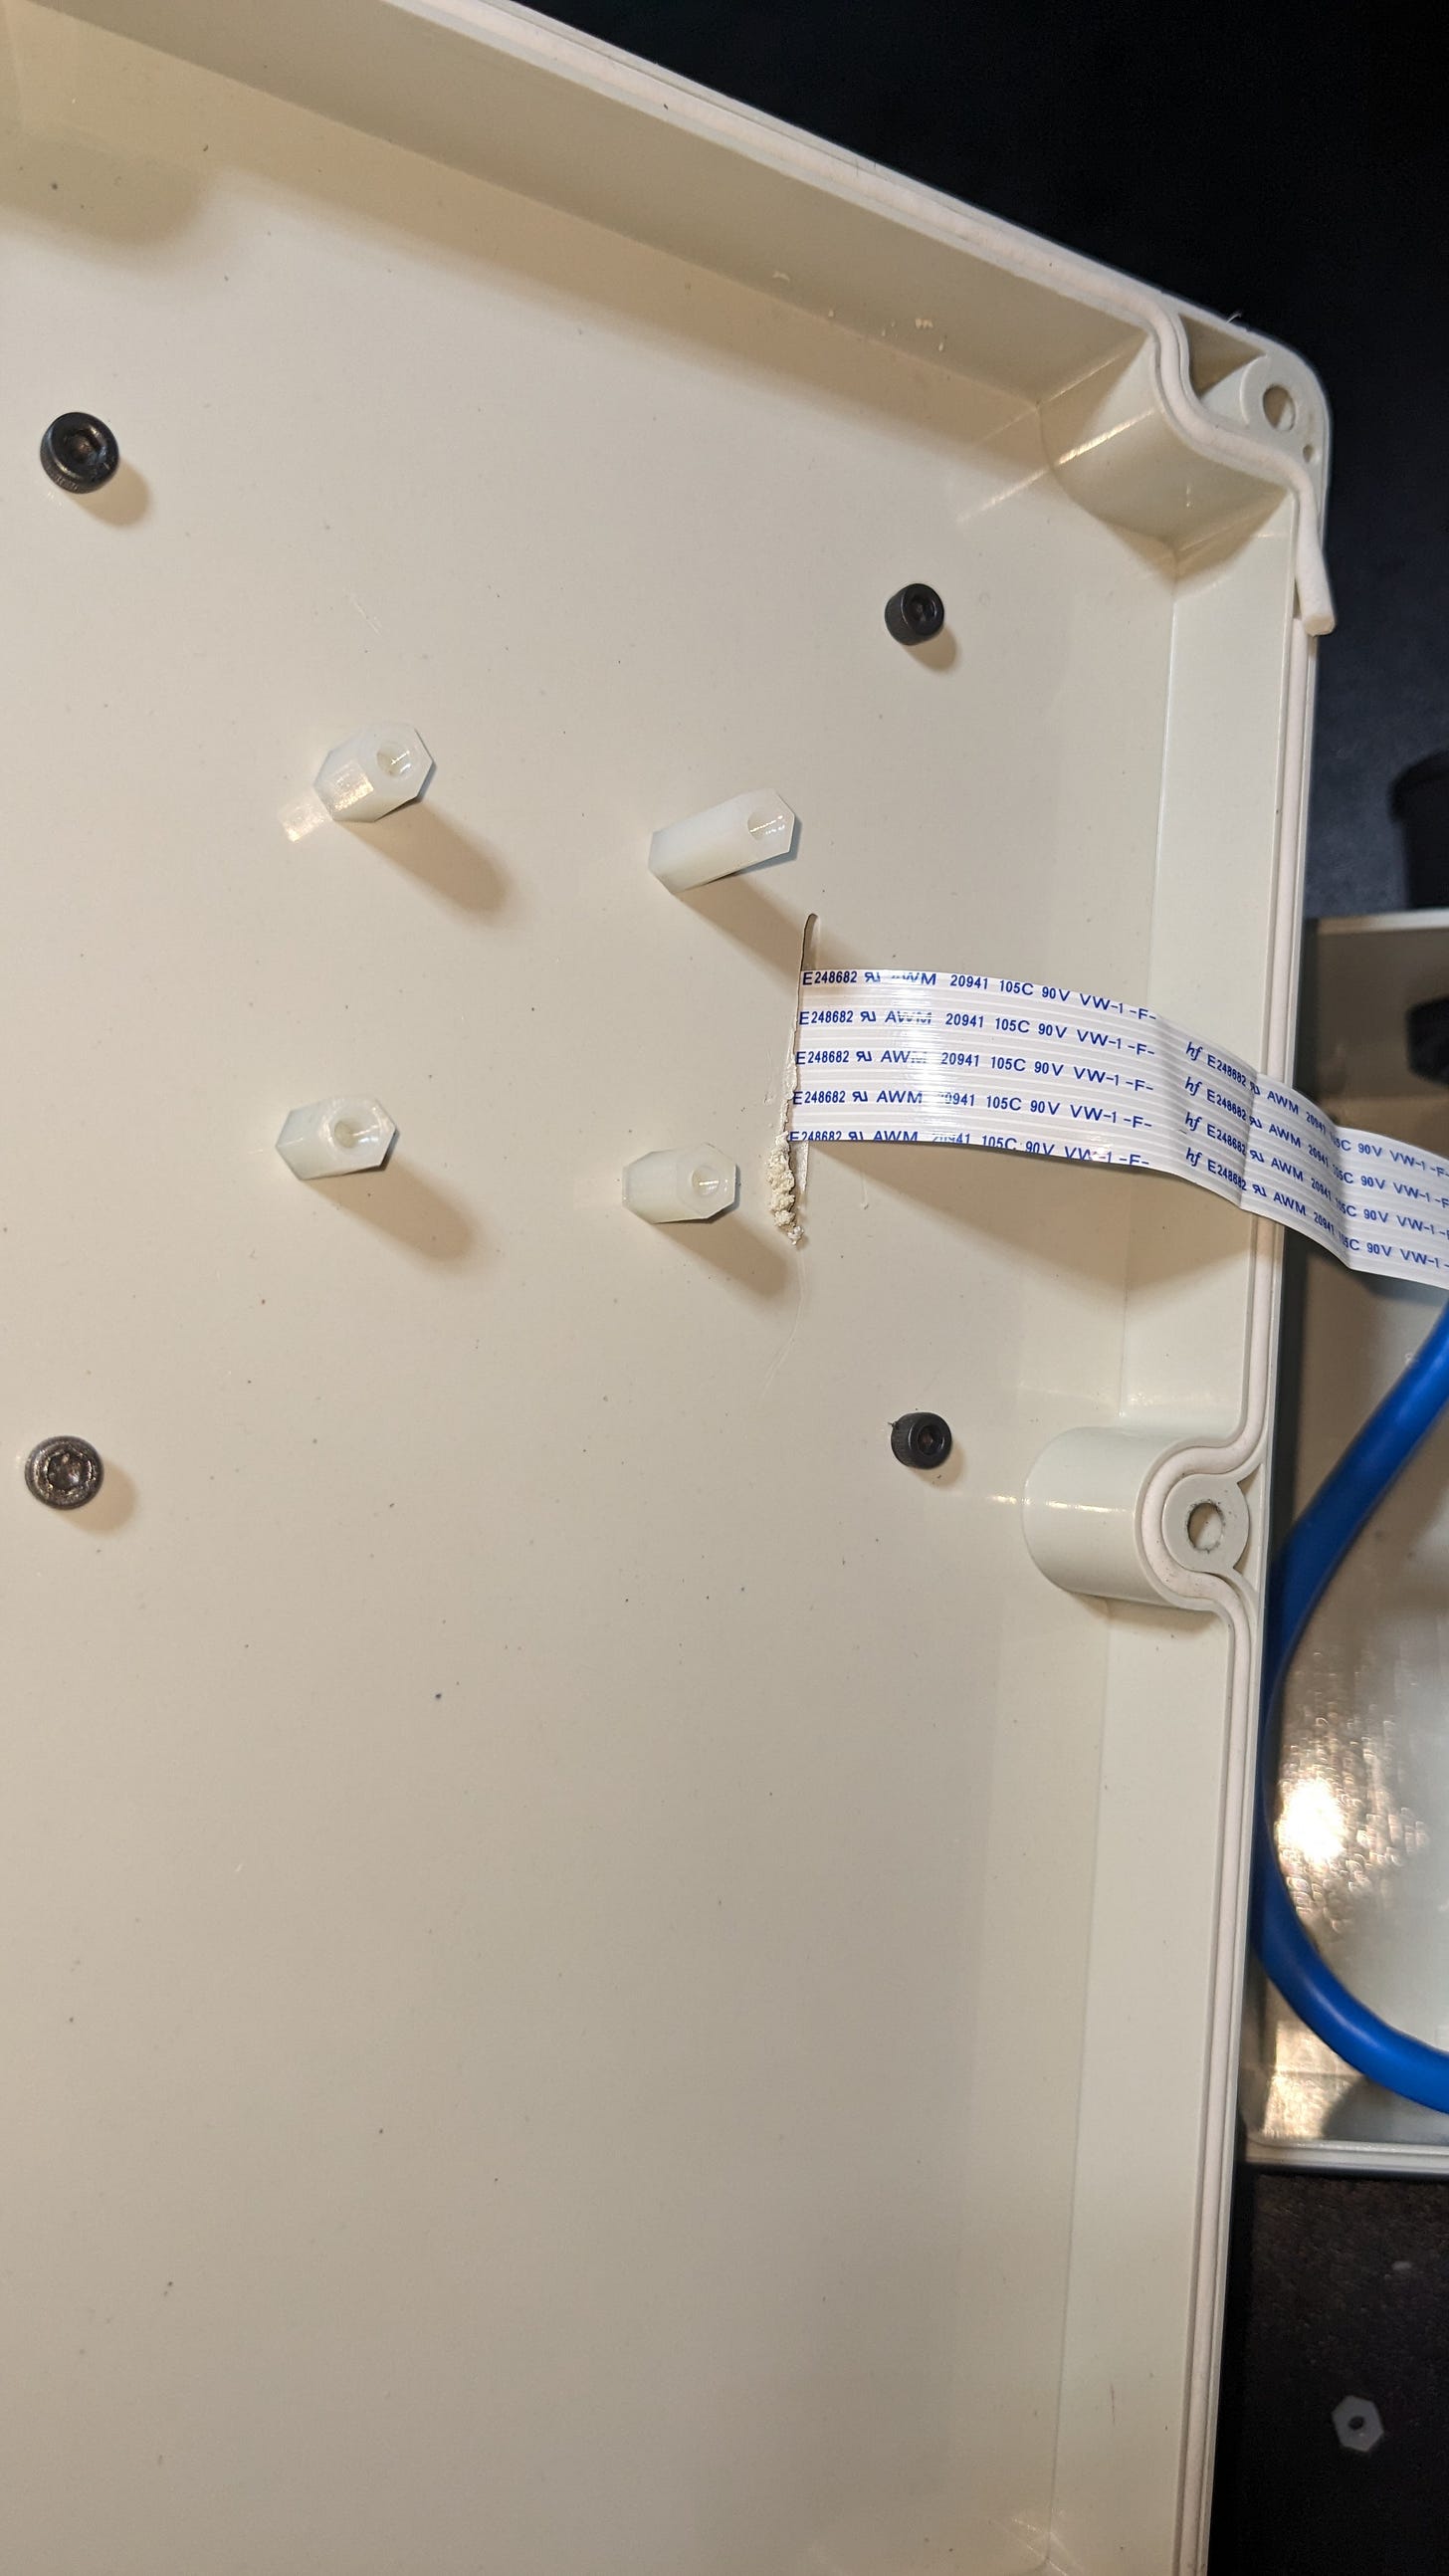
I use nylon screws and additional bolts to position the camera in a 3D space. This allows for adjustments to ensure the camera is centered within the dome. A slit is cut at the top for the camera cable.
A slit is cut in the top where for the camera cable.
I secure the dome by using some metal screws through the bottom. These screws are effectively fastened to the plastic top and threaded using the metal screw. I then use nylon spacers to hold the dome into place. This allows me to remove the dome if I need to.
2. Internal Hardware
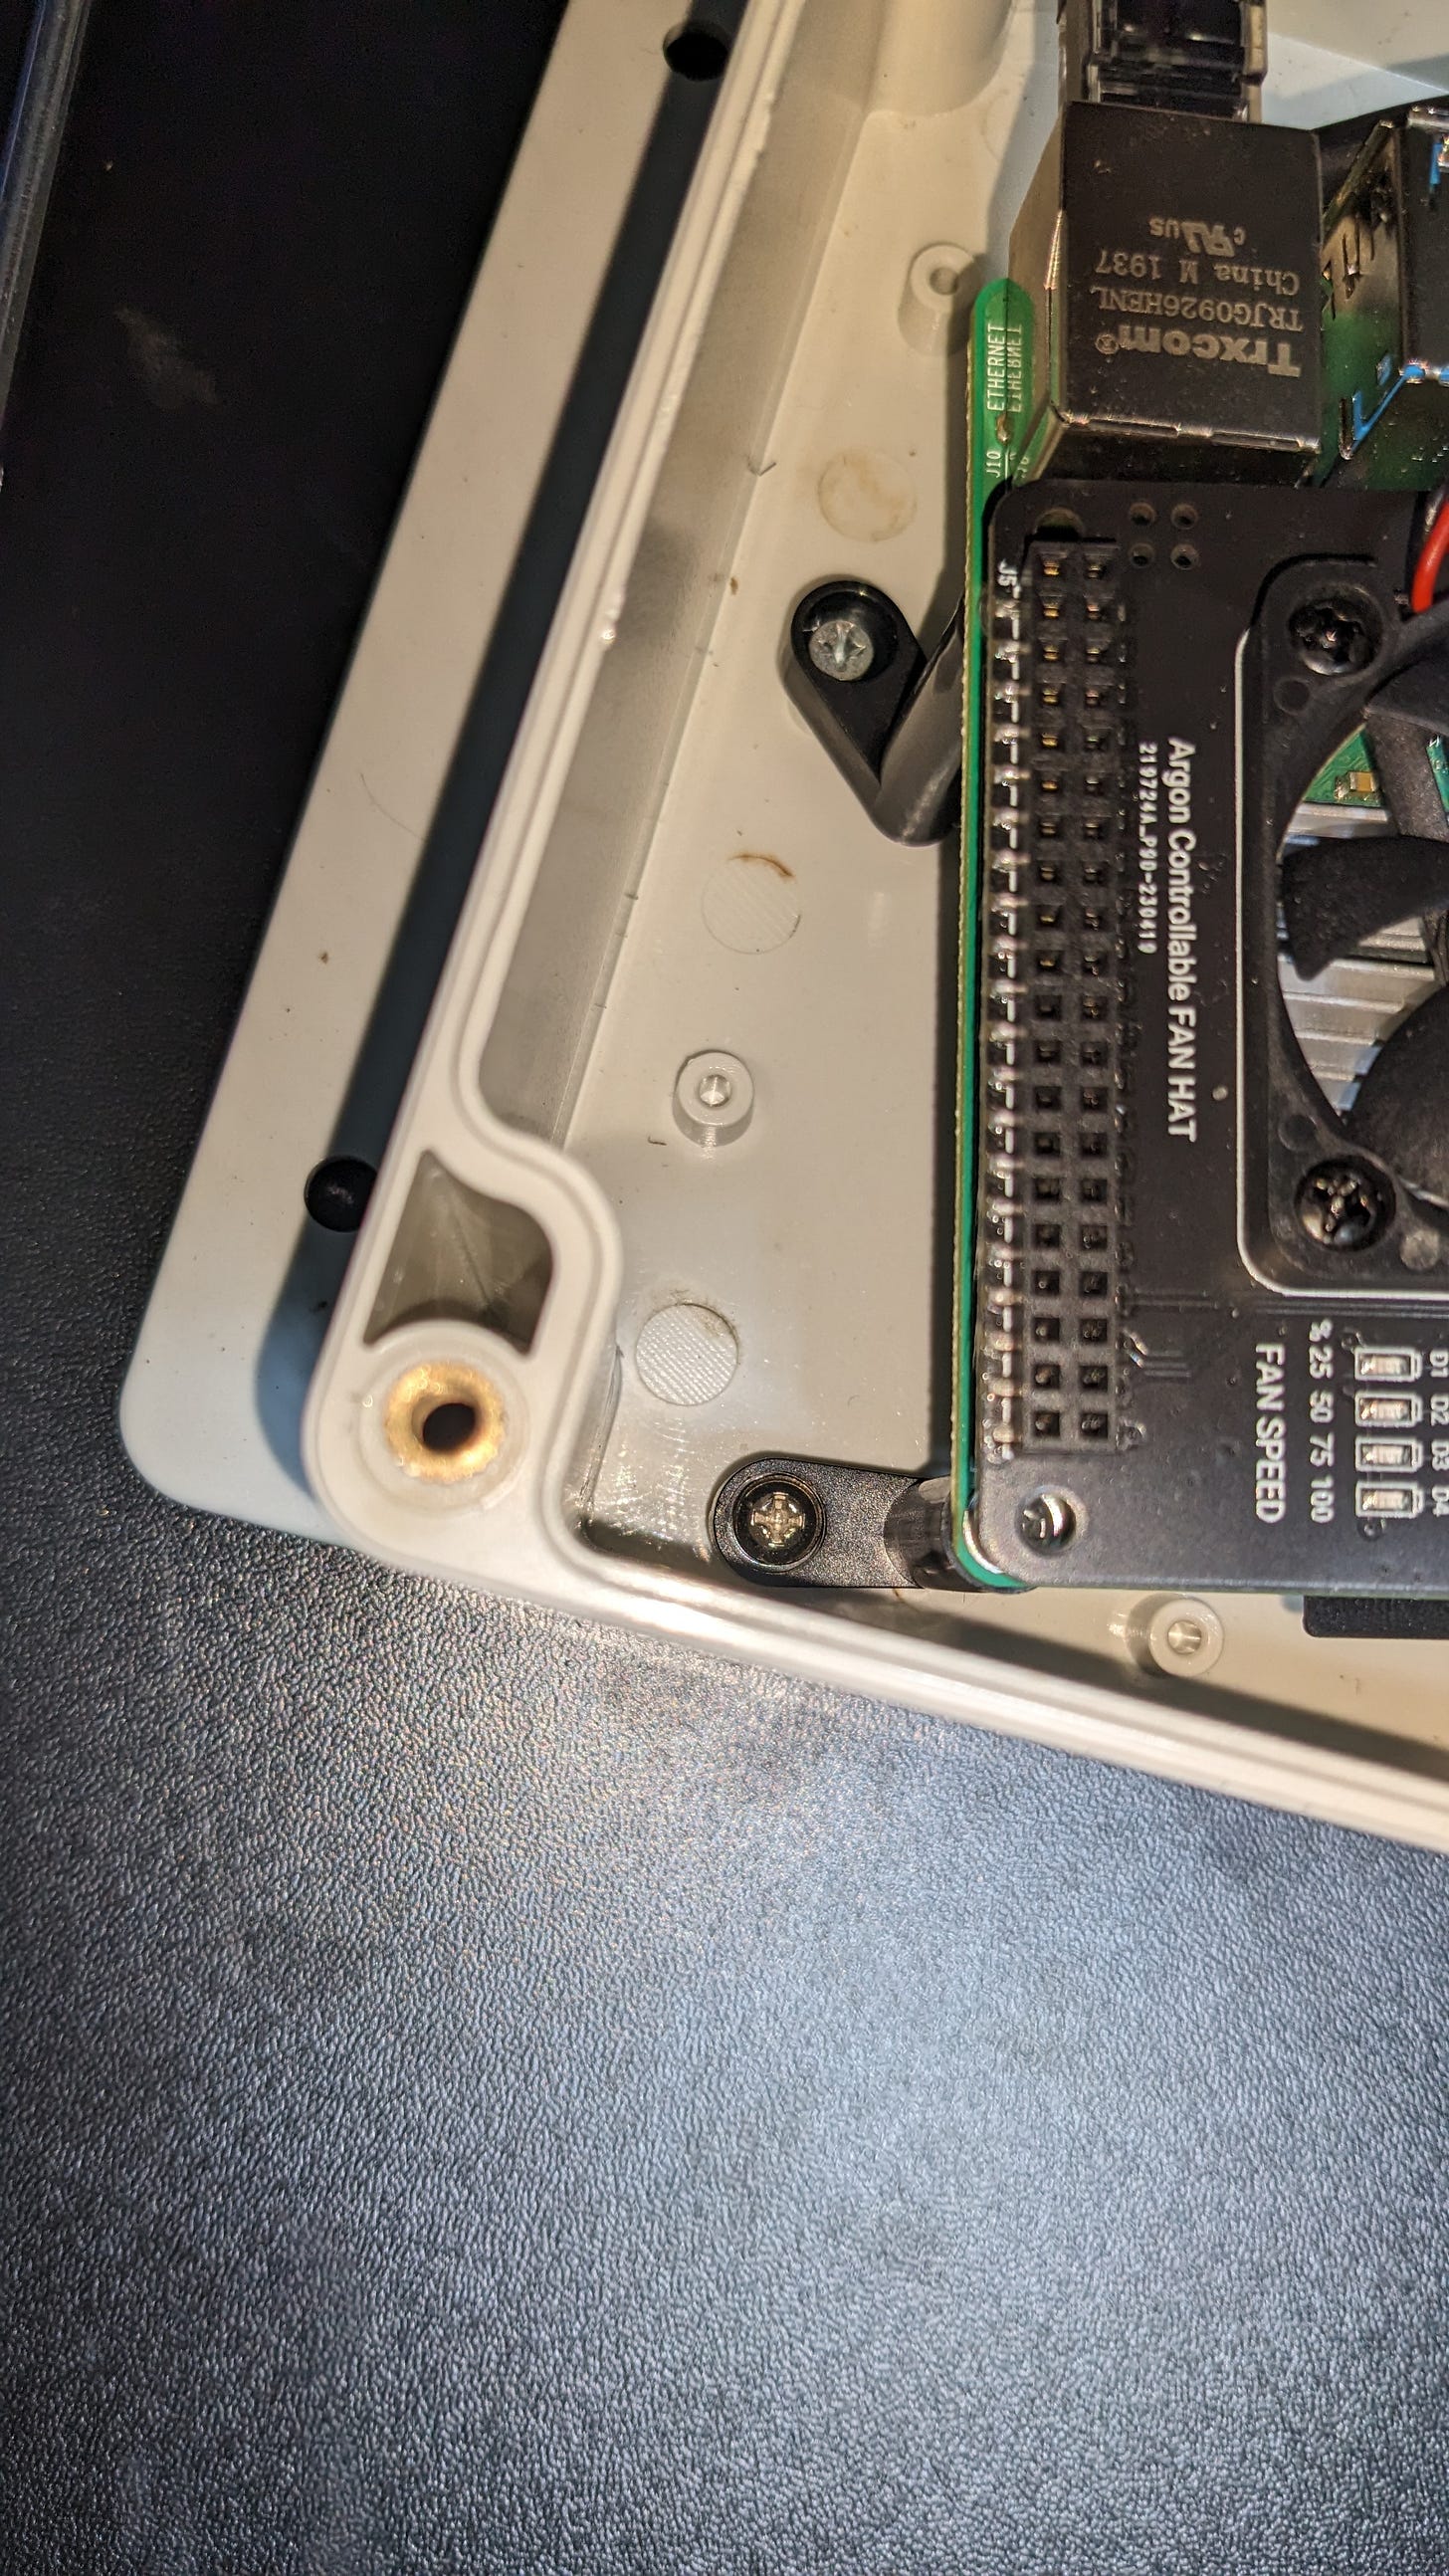
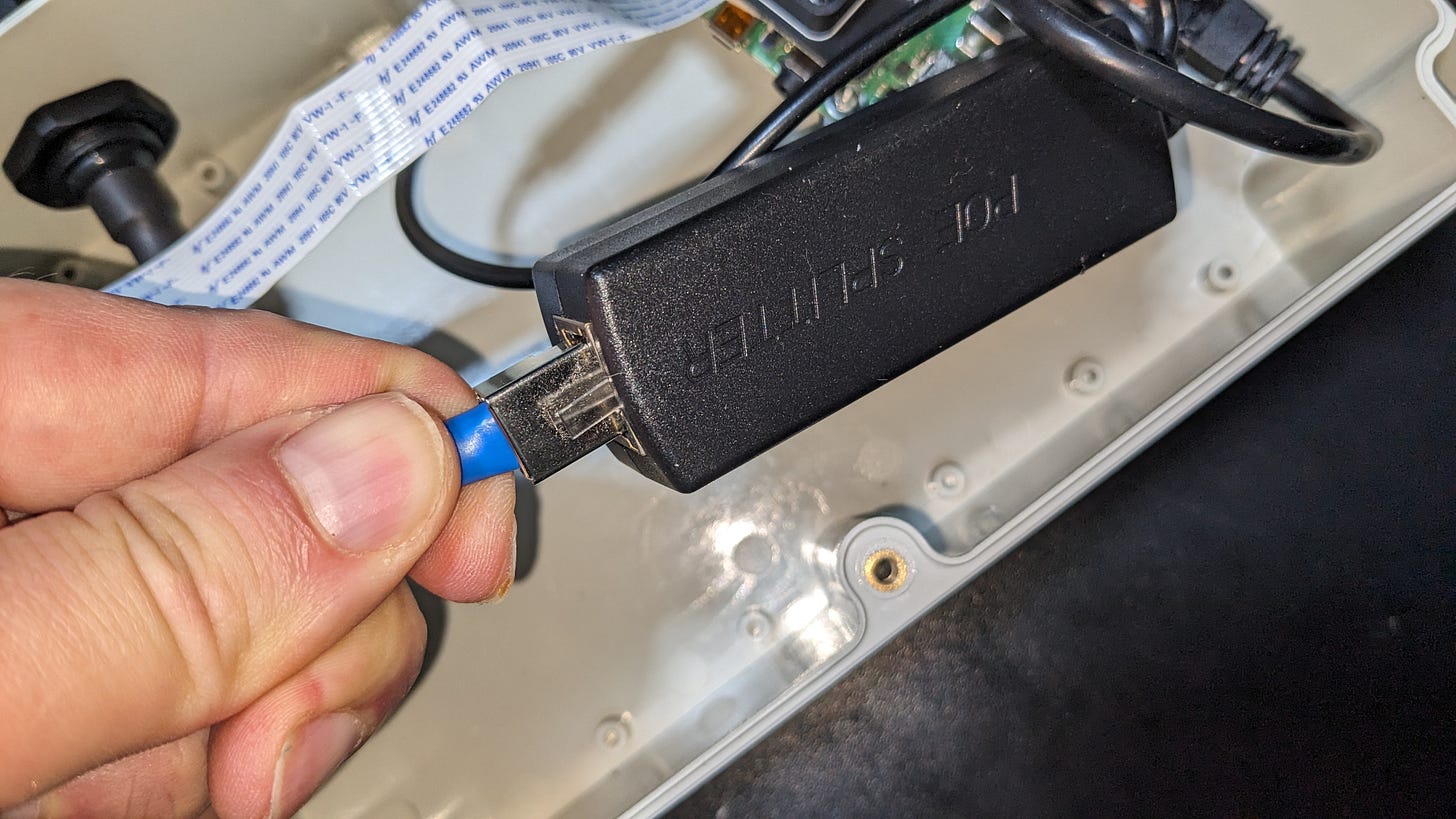
The internals are straightforward. With the case I chose, there's ample room for layout customization. I fastened the Pi to the base using PCB feet, and the POE converter fits neatly underneath.
I fastened the Pi to the base of the case using PCB feet.
The POE converter easily fits under the Pi and the cabling reaches all of the necessary inputs.
3. Camera Adjustment
I have noticed that you can get some reflections on the dome from other light in the area. If you are in a dark area it won’t matter, but what I have noticed that reduced these aberration is to place the camera as close to the dome as possible.
4. Gasket Print
I did print a TPU gasket that fits between the Dome and the case. This should create a water tight seal in the event the camera is left outside in the rain. The following is the openScad code for the gasket:
// Modifiable Parameters
cylinder_diameter = 115; //Diameter of the Gasket
cylinder_height = 3; // Thickness of the Gasket
hole_diameter = 3.5; // Diameter of each screw hole
hole_offset = 3; // Adjustment to move the mount holes

//Parameters
radius = cylinder_diameter / 2;
hole_distance = radius - hole_offset;
angle_step = 360 / 4; // For four holes


difference(){
// Create the gasket
cylinder(h=cylinder_height, r=radius,$fn=128);

cylinder(h=cylinder_height+ 10, r=radius-10,$fn=128);

// Subtract the mount holes
for(i = [0 : 3]) {
    x = hole_distance * cos(i * angle_step);
    y = hole_distance * sin(i * angle_step);
    translate([x, y, -1])
        cylinder(h=cylinder_height + 2, r=hole_diameter / 2,$fn=128);
	}
}
Part 4: The Software Installation
Software installation is straight forward. Use this README.
Part 4: Computer Hardware Recommendations
I highly recommend the use for an Rpi 4 with 4GB of ram. I have tried running this on a RPI 3B+, but I think that due to the image size of the HQ camera output, it really struggled when creating the timelapse. The 4GB Rpi 4 performs this flawlessly.
For power, I used POE. You can construct this device without using POE ethernet, but this method reduces cable complexities.
Conclusion
The AllSky Camera: More Than Just a Gadget
Building an AllSky camera is not just a technical endeavor; it's a journey into the worlds of astronomy, meteorology, and computer science. It's a project that offers a multitude of learning opportunities, making it an excellent choice for STEM education.
Ease of Execution
One of the most appealing aspects of this project is its accessibility. With a straightforward parts list and easy-to-follow steps, even someone with minimal experience in electronics or programming can successfully build an AllSky camera. It's a project that's as educational as it is rewarding, making it perfect for beginners and experts alike.
A Gateway to STEM
For parents and educators looking to ignite a passion for STEM in young minds, this project serves as an ideal starting point. It combines elements of engineering, coding, and observational science, offering a well-rounded educational experience. Plus, the excitement of capturing the night sky and analyzing the images can turn this project into a family or classroom activity that everyone can enjoy.
A Daily Dose of Wonder
Once your AllSky camera is up and running, it becomes a gift that keeps on giving. Each morning, you'll be greeted with a new snapshot of the night sky, serving as a daily reminder of the universe's grandeur and your successful venture into the world of DIY electronics.
Additional Resources
For those interested in taking this project to the next level or encountering any roadblocks, here are some helpful resources, tutorials, and forums to guide you along the way.
https://github.com/thomasjacquin/allsky
https://spectrum.ieee.org/all-sky-camera

